|
 |
 |
 |
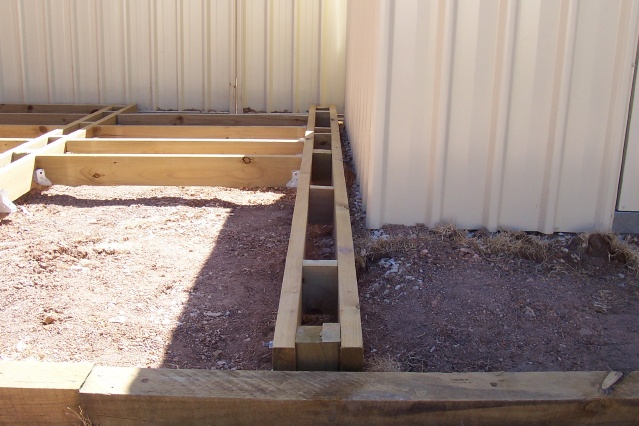
Building a Deck - Installing the BearersInstalling the remaining PostsWith the holes already dug installing the remaining posts was relatively simple. The only thing that really needed to be controlled was getting the posts in a straight line for mounting the bearers up to, and maintaining the diagonals to keep everything square. With an hours worth of work the remaining 4 posts were in the ground with every thing positioned accurately with the use of string lines. Other than nearly slicing my foot off tripping over a string line it all went smoothly. Setting the LevelAfter leaving the posts an hour for the rapid set concrete to go off I proceeded to mark each post to obtain a level. I did this by setting the level of my deck 20mm below the bottom of the shed door and marking the height with a batter board. The week before I had bought an inexpensive rotating laser level ($99.95) which I placed on a level surface and leveled it up further using the integrated screw levellers. When this was done I switched it on and rotated it so it was pointing at my batter board. I then used a ruled spirit level to measure the distance between my proposed deck surface and the beam of the laser level, in my case this was 140mm. All I needed to do then was rotate the laser so it was pointing at each post and mark off where the laser hit the post. Using a carpenters square I measured down 140mm from each mark and hey presto, I have a cut line that is level to my original mark even though the ground was not level. Using the carpenters square I marked off around each post at the cut off level and I was ready to cut the posts level. Cutting the PostsTaking my Circular Saw set to a cut depth of 50mm and held vertically I cut carefully along the marked off lines on the posts. This was done with varying amounts of success, with the last 6 posts a lot more neatly cut than the first few. In fact the cut on the first post was so bad (too long fortunately) I ended up making several closely spaced cuts in the top and removing the excess with a 12mm chisel and mallet. After cutting each post and finishing the top surface I took a straight edge and placed it across the posts. I placed a spirit level on the straight edge to check the level. Fortunately all was looking good. Recessing the PostsEach post needed to be rebated 20mm on each side to house the bearers. I did this by marking each post 145mm (the height of my bearers) down from the top of the post on each side. Taking my circular saw I set the cut depth to 20mm and made a series of closely spaced cuts along each rebate. I then removed the excess material with a chisel and in some cases finished off the surface with a heavy rasp. Installing the BearersMy bearers are 140mm x 45mm by 3.6 meters. Using my mark 1 eyeball I chose the the straightest 6 lengths as my bearers. Using Quick Clamps I clamped a bearer to each side of the rebated posts. Making one final check with my level to ensure the bearers were level (one was out a little so I packed it out at one end with some sheet metal shims) I was ready to drill and bolt the bearers to the posts. I used a 10mm auger bit on my power drill to drill two holes in each bearer/post join. To this I bolted up 10mm x 180mm cup head bolts with a a washer and nut. All of them were hot dip galvanized. How much did I get done?A lot more than I expected , considering I only spent around 5 hours working today. For the first time the weather was kind (it was only about 28°) and because of careful preparations things were largely square and level and required little or no adjustment. I was more than happy with myself when I checked off the diagonals of the site and they were only around 1mm out across the 4.2 meter length. Time was even available at the end of the session to mark off the bearers for the joist holders and to nail up half a dozen joist holders on one side. |
|